Wolf3d Haven Forum

Please log in or register. Smile

Join the forum, it's quick and easy

Wolf3d Haven Forum

Please log in or register. Smile

Wolf3d Haven Forum

Would you like to react to this message? Create an account in a few clicks or log in to continue.
Wolf3d Haven Forum

A friendly Wolfenstein 3D community, about Wolfenstein 3D, the game that gave birth to first person shooters...


+2
Tragos2d
stathmk
6 posters

    Art Tutorials

    doomjedi
    doomjedi
    Hardcore Wolfer
    Hardcore Wolfer


    Male
    Number of posts : 1378
    Age : 45
    Location : Israel
    Hobbie : Gaming and Modding, Pixel Art
    Registration date : 2007-03-26

    Art Tutorials Empty Art Tutorials

    Post by doomjedi Fri Mar 25, 2011 1:42 am

    As I have much experience in spriting, people recently ask me to make and post tutorials regarding different aspects of artwork.

    I think this can be a good thread for such requests and tutorials...that can also be revisited later with added related screens and such.

    People asked me how to make custom skies etc...

    I can only tell the way I myself work. I don't claim those are the best tools, ways, and softwares to use.
    I just want to tell people "how I do it" Smile

    So let's start Smile

    Tutorial number 1 - Using RecolorBMP

    RecolorBMP is semi-automatic recoloring of 256-color images. By semi-automatic I meant that you manually control recoloring of each color in the palette..the fullest control you can get in recoloring.

    http://winwolf3d.dugtrio17.com/

    When you open it, select a directory where your sprites are. When you select your sprite, a preview window appear. Left side shows the image before recoloring, and the right one shows the images in the current state of the recoloring. When you go with the mouse over the left picture, the colors you (the mouse) are over them are shown (kinda highlighted) in the palette table, so you can see the color range of the current colors used. For example you see that your image has greens from one light green to certain dark green. You want to recolor it to (let's say) red ...so you manually recolor those pixels usung the palette table - left mouse click select the color to be recolored, and right click over another color recolors all of the pixels of the "left-clicked" color to the new color. so you go, color by color - left click - right click, left click - right click...you see the current preview in the right window. By first selecting (with a mouse) an area in the left picture, only that area will be recolored. In the menu there is an option to reverse it - to make only all the pixels outside the selected area to be recolored (options--> recolor outside the selection). Then, if there is more than one image to recolor, you select all of the files on the left (using shift+down arrow) and press "recolor selected BMPs" button. All the images will be instantly recolored, with backup of the original images saved in a subdirectory, so it's reversable.
    you can save the current recoloring scheme with "color map"-->save as ...for later use.
    ...don't forget to reset first the color palette before next recolorings (color map --> reset)
    doomjedi
    doomjedi
    Hardcore Wolfer
    Hardcore Wolfer


    Male
    Number of posts : 1378
    Age : 45
    Location : Israel
    Hobbie : Gaming and Modding, Pixel Art
    Registration date : 2007-03-26

    Art Tutorials Empty Re: Art Tutorials

    Post by doomjedi Fri Mar 25, 2011 1:43 am

    Tutorial number 2 - Making simple (parallaxed) sky.

    1. Think of a concept for the sky to fit your mod.

    2. Find and download the right image using internet or other games. Try to see skies in Wolf3D-fitting palette.

    3. Resize the image to 64x1024 using any art software. Crop if needed. For skies from games, that are less photo-looking - use "nearest neighbour" resizing if possible to keep the sharpness and pixelness of the image. For photo-skies you can use "gaussian resizing".
    Better not use MS-Paint for 256-colors resizing (skies from old games) - as it's doesn't make a good work. Anyway- try not to resize 256-palette images in Ms-Paint - use other software (I use XNView (or IrfanView) - note again my "resizing type" remark)
    http://www.xnview.com/
    http://www.irfanview.com/
    But you can use any other program.

    4. Save the sky as BMP image, if on MS-Paint - use BMP (24-bit colors) option, not "256 colors" one.

    5. The the sky is not horizontally scrollable - edit it artwise so it's end will fit it's beginning. Using "ready" skies from other games saves this step.

    6. If original images doesn't fit such 64x1024 proportions well - you can make a pasted "chain" of such images - if horizonally scrollable at this point.
    This can be done after step 7 instead.

    7. Open "SpriteMaker" program. Convert the sky into Wolf3D palette. If conversion looks bad - try to convert first to some other 256-color palette of choice (so later to recolor it to better-fitting colors for conversion. Good colors are red (the best) and orange or blue shades - after palette conversion those can be recolored to other color range)

    6. Open the file in MS-Paint.

    7. Increase canvas size:
    Image --> attributes --> width = 1040 (not 1024!)

    8. Start from the END of the sky - and start shifting 64x64 parts of the sky to the right, leaving a white row of pixels in between. If you do it well - you'll understand now why you resized the canvas of the image to 1040 instead of 1024.
    This stage's goal is to help us to do less copying mistakes in the next step.

    9. You can save the current image at any state.

    10. Now open another MS-Paint window.

    11. Cut (not copy) and paste 64x64 sky frames from the first image to the new window - saving it each time as a new image with sequential sky frame name.

    12. Use RecolorBMP if needed to recolor the sky. Such recoloring can create evening (orange), night (black/dark grey), rain (grey), snow (white), morning (yellow), day and hellish (red) variants of the sky.

    13. Now you have your sky Smile Insert it into the VSWAP Smile


    Last edited by doomjedi on Fri Mar 25, 2011 7:02 am; edited 3 times in total
    doomjedi
    doomjedi
    Hardcore Wolfer
    Hardcore Wolfer


    Male
    Number of posts : 1378
    Age : 45
    Location : Israel
    Hobbie : Gaming and Modding, Pixel Art
    Registration date : 2007-03-26

    Art Tutorials Empty Re: Art Tutorials

    Post by doomjedi Fri Mar 25, 2011 1:49 am

    Tutorial number 3 - Adding objects to the sky

    1. Do previous tutorial till step 6.

    2. Find and image you want to add to the sky.

    3. Resize it to fit, convert to Wolf3D palette.

    4. Color all "planned to be transparent" parts of the image by the same color - preferrably white.

    5. Open sky image (preferrably that is unsplit - meaning that only steps 1-9 of previous tutorial are done on it)

    6. Increase it's canvas size.

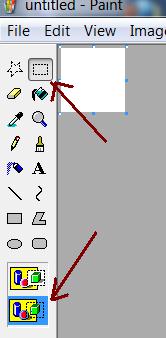
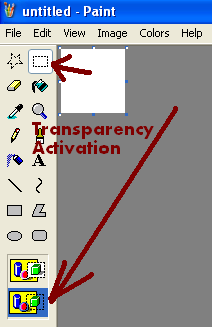
    7. Rightclick on the "empty" white spot to select transparency color (the same transparent color of the "to be added" image

    8. Select MS-Paint transparency selection (first row on toolbuttons - right "select" icon --> "transparent selection" below the toolbar - the lowerst option)

    Art Tutorials Tut110

    9. Paste the new image over the sky - in the right spot

    10. Do steps 11-13 of previous tutorial on the sky image.
    doomjedi
    doomjedi
    Hardcore Wolfer
    Hardcore Wolfer


    Male
    Number of posts : 1378
    Age : 45
    Location : Israel
    Hobbie : Gaming and Modding, Pixel Art
    Registration date : 2007-03-26

    Art Tutorials Empty Re: Art Tutorials

    Post by doomjedi Fri Mar 25, 2011 3:17 am

    Tutorial number 4 - Making floor/wall textures

    Remark: Wall texture needs to he horizontally "scrollable". Floor texture needs to be also vertically scrollable. But the methods are the same.
    I'll talk about walls.

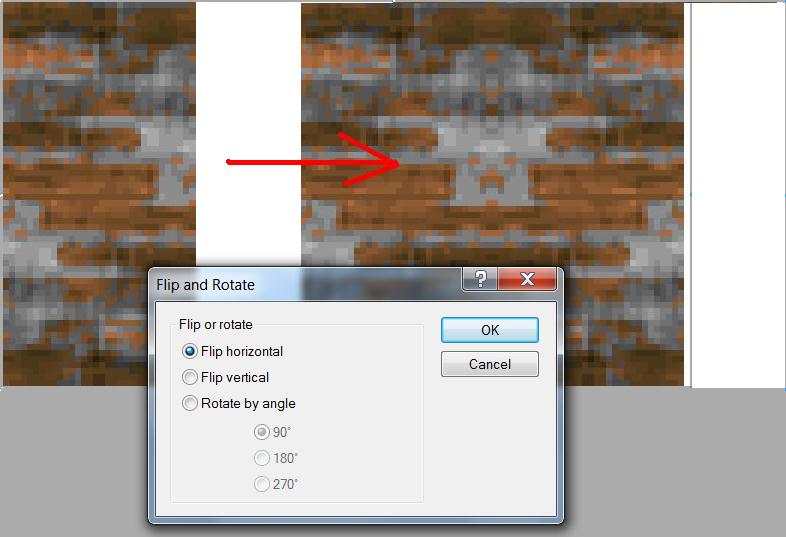
    0. The easiest ways to create walls (and even floors) - it to flip 64x32 image horizontally (or 32x32 image vertically and horizontally for floors) - MS-Paint --> image --> flip/rotate.

    Art Tutorials Tut2_110

    This is fast, but the result is a wall that it's too repeatable in it's pattern and too mirror-like simmetrical. Still can work for grass and such.

    So now - the full way Smile

    1. Find appropriate image, resize it to 64x64 and convert to Wolf3D palette using SpriteMaker.

    2. Open the file in Ms-Paint

    3. Double+1 the canvas size (image --> attributes --> width=129)

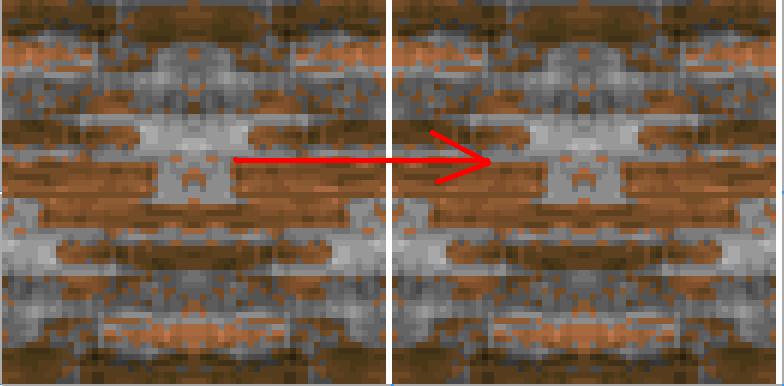
    4. Copy the image to the right, leaving one black white vertical line to separate the images.

    Art Tutorials Tut2_210

    5. Edit the left and right edges of the original image to be consistent with the edges of the "right" image. Always edit only the original (left) image!

    6. After the edit - over-copy the new image again to the right, and see if there are more fixes needed.

    7. Repeat steps 5 + 6 till done.

    8. For floor textures - repeat steps 3-7 again - this time vertically.

    9. Sometimes it's more comfortable to tripple the canvas size, and edit the image in the middle - re-copying it again to right and left after every edit phase.


    Last edited by doomjedi on Sun Mar 27, 2011 1:00 am; edited 1 time in total
    doomjedi
    doomjedi
    Hardcore Wolfer
    Hardcore Wolfer


    Male
    Number of posts : 1378
    Age : 45
    Location : Israel
    Hobbie : Gaming and Modding, Pixel Art
    Registration date : 2007-03-26

    Art Tutorials Empty Re: Art Tutorials

    Post by doomjedi Fri Mar 25, 2011 5:12 am

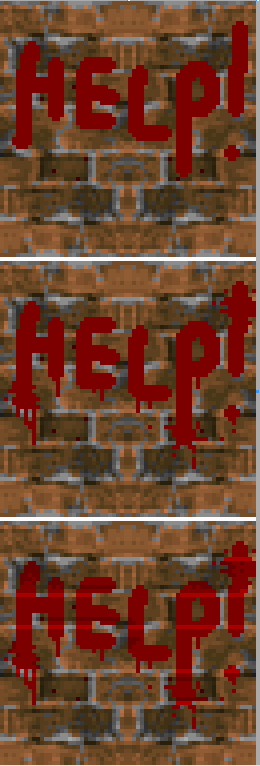
    Tutorial number 5 - Adding real-looking writings to wall textures, including bloody ones.

    1. Select a wall texture (assuming it's already 64x64 in Wolf3D palette)

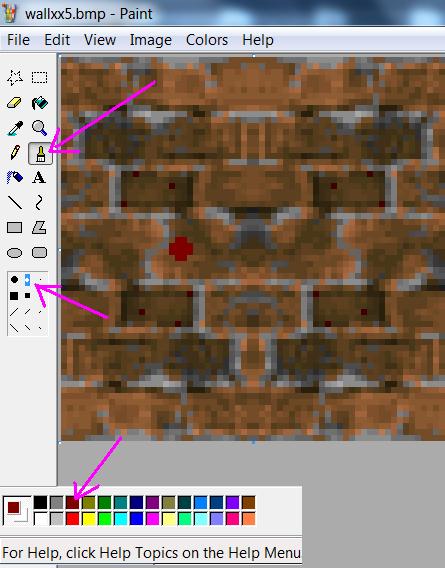
    2. Select the dark red color - and small or medium brush radius - to keep it thick while still allowing for enouph resoluton for writing text. In rare cases you can use the full-brush radius.

    Art Tutorials Walle110

    3. Write the text, in a not over-accurate way.

    4. Add paint (vertical) drippings and "sun-like" paint splashes - while keeping the letters readable.

    5. Change the shades of the text to fit the particular texture's dark/light zones/areas. In case of brick walls - it'd just be (fore most cases) making the areas between bricks lighter/darker depending on a texture.
    Don't use more than 1 additional red shade (within the same area of the texture)! For blood - use only 2 dark red shades, no bright shades.

    Steps 3, 4 and 5:

    Art Tutorials Wallee10

    6. That's it Smile


    Last edited by doomjedi on Sun Mar 27, 2011 1:02 am; edited 1 time in total
    stathmk
    stathmk
    Veteran
    Veteran


    Male
    Number of posts : 1788
    Age : 44
    Location : Indiana, United States
    Job : fast food worker & wolfensteingoodies.com webmaster
    Hobbie : old games & young dames
    Registration date : 2008-04-08

    Art Tutorials Empty Thanks!

    Post by stathmk Sat Mar 26, 2011 2:06 pm

    Thanks for the tutorials! I hope to use them for making the games later!
    doomjedi
    doomjedi
    Hardcore Wolfer
    Hardcore Wolfer


    Male
    Number of posts : 1378
    Age : 45
    Location : Israel
    Hobbie : Gaming and Modding, Pixel Art
    Registration date : 2007-03-26

    Art Tutorials Empty Re: Art Tutorials

    Post by doomjedi Sun Mar 27, 2011 12:59 am

    You're welcome Smile
    ...now, with at least 1 feedback - I'll consider making more tutorials Smile
    doomjedi
    doomjedi
    Hardcore Wolfer
    Hardcore Wolfer


    Male
    Number of posts : 1378
    Age : 45
    Location : Israel
    Hobbie : Gaming and Modding, Pixel Art
    Registration date : 2007-03-26

    Art Tutorials Empty Re: Art Tutorials

    Post by doomjedi Sun Mar 27, 2011 6:12 am

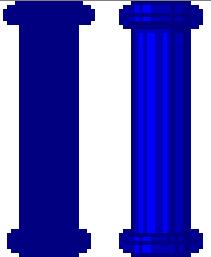
    Tutorial number 6 - Perspective - Making radial objects - columns, trees, barrels...

    1. The most important thing is not to make it's upper and lower edges flat - but to give them perspective:

    Art Tutorials T110

    -------
    Tutorial number 7 - Staring making a sprite:

    1. First use just one color (or two) - to make the general shape/body of the object. Only then start adding colors and shades.

    Art Tutorials T210

    -------
    Tutorial number 8 - Shading/texturing basics:

    1. Note how different material are shaded and textures differently.

    Vertical shading is good for smooth/shiny objects....glass and metal mostly. Note the white "shine" stripe.
    Irregular checkboard-type shading is good for rocks and very non/smooth surfaces.
    "Ripped" vertical/horizontal lines are good for wooden surfaces.

    Art Tutorials T310


    doomjedi
    doomjedi
    Hardcore Wolfer
    Hardcore Wolfer


    Male
    Number of posts : 1378
    Age : 45
    Location : Israel
    Hobbie : Gaming and Modding, Pixel Art
    Registration date : 2007-03-26

    Art Tutorials Empty Re: Art Tutorials

    Post by doomjedi Sun Mar 27, 2011 7:13 am

    Perspective in grass, moss, icycles

    While most mods use "flat-type" moss and such - using perspective looks more real, more 3D and looks much more natural on sprite auto-rotation.
    Just don't shift too high from the bottom or too low from the upper side. Perspective can look okay with up to 3-4 pixels from the edge.

    Try to make center parts longer, and sideparts shorter.

    Art Tutorials T410
    Ipank7000
    Ipank7000
    Can I Play, Daddy?
    Can I Play, Daddy?


    Male
    Number of posts : 42
    Age : 27
    Location : Depok, Indonesia
    Job : Studying in Indonesia University (Universitas Indonesia)
    Registration date : 2011-04-21

    Art Tutorials Empty Re: Art Tutorials

    Post by Ipank7000 Thu Apr 21, 2011 3:21 pm

    Thx for tut Smile


    Sleeping.... ( -.-) zZz
    stathmk
    stathmk
    Veteran
    Veteran


    Male
    Number of posts : 1788
    Age : 44
    Location : Indiana, United States
    Job : fast food worker & wolfensteingoodies.com webmaster
    Hobbie : old games & young dames
    Registration date : 2008-04-08

    Art Tutorials Empty Thanks.

    Post by stathmk Thu Apr 21, 2011 4:41 pm

    DoomJedi, I had forgotten to thank you for the tutorials update. Thanks!
    doomjedi
    doomjedi
    Hardcore Wolfer
    Hardcore Wolfer


    Male
    Number of posts : 1378
    Age : 45
    Location : Israel
    Hobbie : Gaming and Modding, Pixel Art
    Registration date : 2007-03-26

    Art Tutorials Empty Re: Art Tutorials

    Post by doomjedi Fri Apr 22, 2011 7:23 am

    stathmk wrote:DoomJedi, I had forgotten to thank you for the tutorials update. Thanks!
    You're welcome Smile

    Now if someone has some other "how-to" - you can ask Smile
    doomjedi
    doomjedi
    Hardcore Wolfer
    Hardcore Wolfer


    Male
    Number of posts : 1378
    Age : 45
    Location : Israel
    Hobbie : Gaming and Modding, Pixel Art
    Registration date : 2007-03-26

    Art Tutorials Empty Re: Art Tutorials

    Post by doomjedi Fri Apr 22, 2011 7:44 am

    "Recoloring with RecolorBMP" tips - Part 1


    (Just as an example - and for the sake of the explanation, to make it more concrete and readable) - I'll refer to recoloring reds (aka RED) to blues (aka BLUE) Smile


    1. Note that you can recolor only a selection of the image (or everything outside the selection)

    2. First "scan" ("mouseover"-see which is the brightest and the darkest) RED colors to see the range of RED colors you want to recolor - as many sprites don't use darkest or brightest of colors within REDs 0 but only a limited range. It'll help you to map it to different color scale and even recolor to colors that have less distinct colors than REDs included in the palette.

    3. Note that not RED colors are used....before automatically turn all REDs to parallel BLUEs - see if there are REDs that are not used in the particular sprite - and so can be "skipped".

    4. Recoloring skin, hands, heads and multiple areas within the sprite - just select one area (one hand for example)- press "recolor" - select the other hand - press recolor...etc.... This way you can recolor different areas of the sprite in just a few sec - using the fact that previous recoloring is saved.

    5. For recoloring palette you plan to use in the future - save it for future use, gove it a clear name.

    6. After saving the palette (and even before) - note that the recoloring palette is changed and colors of the sprite no longer match the palette (sure if you re-open RecolorBMP) - so press Color Map --> Reset to return to original palette scheme in such case Smile Will work like a charm Smile
    Do it always before creating another recoloring map (and just to be sure - each time you open Recolor BMP)

    7. If you recolored - but need a darker colors - you can just recolor within the same BLUEs - just recolor each BLUE to a darker/lighter BLUE a few steps to the right/left Smile Sure it's much easier to do with SpriteMaker - but why to leave the current tool? Smile also here you have per-color control of the result.

    8. Save the recoloring scheme as often as you can, because of the occasional crashes. In a case of a crash, you can recover the sprite from the auto-backup folder the program creates.


    Last edited by doomjedi on Sat Jun 14, 2014 12:30 am; edited 1 time in total
    doomjedi
    doomjedi
    Hardcore Wolfer
    Hardcore Wolfer


    Male
    Number of posts : 1378
    Age : 45
    Location : Israel
    Hobbie : Gaming and Modding, Pixel Art
    Registration date : 2007-03-26

    Art Tutorials Empty Re: Art Tutorials

    Post by doomjedi Fri Apr 22, 2011 7:58 am

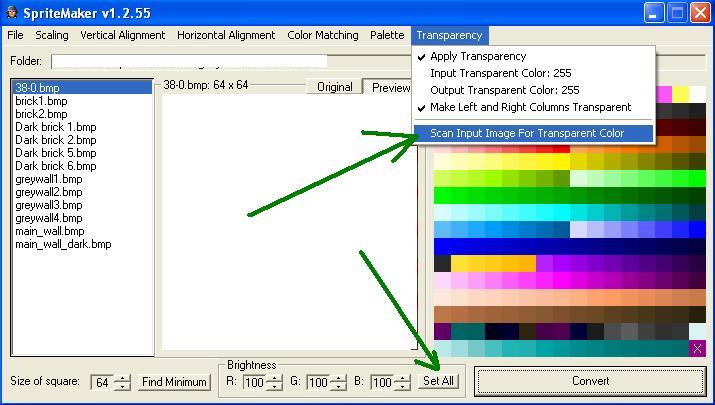
    Using "SpriteMaker" tips - part 1

    1. Note the "set all" button - that let's you to see all the brightness colors to the same value without manually changing each one. Note that it can be higher than 100 Smile

    2. In case the image that is supposed to be transparent - is not - use the
    tranparency --> scan input image for transparent color
    option

    Art Tutorials Smaker11

    3. Not all "darker" walls use the same "darker" brightness setting...for most cases it's 95% or 90%...but it can be any number - depending on the particular image, palette, color range, material of the wall to recolor...wood, stone... Always use the preview window. The main goal is to make image not too dark, not too light - and yet preserve it's color richness (aka "color range") - so if 95% make the images to gave less shades of the main color - try just 94....93...till perfect result is achieved - darker - but with the same richness of colors.
    If you'll just automatically use the same (for example 90%) for all darker wall variants - you'll lose color richness and it won't look good.

    4. Note that "SpriteMaker" saves it's brightness values...even for next load. so always bring it back to "100" (set all --> 100) after each task ("task" can be more than 1 image).

    5. Note that some walltypes need the darker version to be the same as the light one! - forest textures, of trees and such... Don't make it too wall-shaded (or shaded at all), as those are grown in a free formation and have no "square shading". FORESTS DON'T GROW/SHADE IN A STRAIGHT 90 degree LINE LIKE WALLS! Also background textures if no parallaxed sky is used. So don't work on autopilot - think of the particular texture and what it represents - before making darker variant. This is a common mistake.


    Tragos2d
    Tragos2d
    Bring em' On!
    Bring em' On!


    Male
    Number of posts : 140
    Age : 125
    Job : Pouring gasoline on fires.
    Hobbie : Talent is so unpopular...
    Registration date : 2011-07-06

    Art Tutorials Empty Re: Art Tutorials

    Post by Tragos2d Wed Jul 06, 2011 3:12 pm

    Excellent tutorials. This will help me adjust to the 256 color limitations. Very Happy
    doomjedi
    doomjedi
    Hardcore Wolfer
    Hardcore Wolfer


    Male
    Number of posts : 1378
    Age : 45
    Location : Israel
    Hobbie : Gaming and Modding, Pixel Art
    Registration date : 2007-03-26

    Art Tutorials Empty Re: Art Tutorials

    Post by doomjedi Fri Sep 30, 2011 2:29 pm

    You're welcome Smile

    If there are more specific requests - can try to answer.
    I have a nice tutorial on how to make textured stone/brick walls.
    doomjedi
    doomjedi
    Hardcore Wolfer
    Hardcore Wolfer


    Male
    Number of posts : 1378
    Age : 45
    Location : Israel
    Hobbie : Gaming and Modding, Pixel Art
    Registration date : 2007-03-26

    Art Tutorials Empty Re: Art Tutorials

    Post by doomjedi Fri Sep 30, 2011 3:33 pm

    Tutorial - making textured stone/brick wall

    1. Choose "average"/"main" color of your planned wall:

    Art Tutorials 111

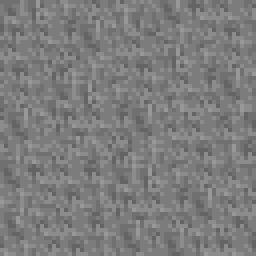
    2.Create small area of "random placed" pixels of close shades of the same basic "average" color - so some are a bit darker than average - and some lighter. Pattern can be more grainy or less - depending on brick type/look you are trying to achieve.
    (those can be easily copied from real brick/wall photo or image - to add it even more realistic look, in the example - it's manually placed pixels, without much "order")

    Art Tutorials 211

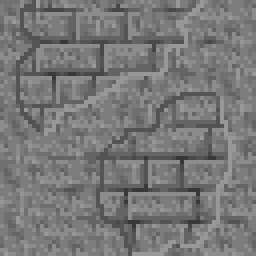
    3. Duplicate this area (with vertical/horizontal flips) over the whole wall area.
    Manually edit single "stand-out" pixels to make the pattern look less repeatable/recognizable, use vertical and horizontal flips and such tricks. Intersect patterns to create unique look.

    Art Tutorials 312

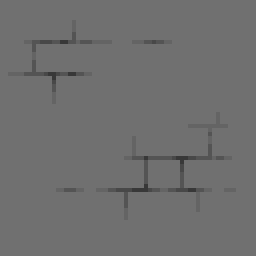
    4. Create brick line pattern using colors over/under the "average wall color". It can take full 64x64 image (divided into bricks) or part of it...can have 2-pixel brick line or just 1 pixel thin one.

    Art Tutorials 411

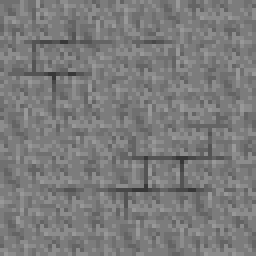
    5. Paste the brick pattern over base texture selecting average color as transparent

    Art Tutorials 710

    6. Add brick shading on brick edges do simulate brick depth - sometimes it's not needed, depending on a type of a wall.

    Art Tutorials 511

    7. Make final touch-ups:

    Art Tutorials 610
    doomjedi
    doomjedi
    Hardcore Wolfer
    Hardcore Wolfer


    Male
    Number of posts : 1378
    Age : 45
    Location : Israel
    Hobbie : Gaming and Modding, Pixel Art
    Registration date : 2007-03-26

    Art Tutorials Empty Re: Art Tutorials

    Post by doomjedi Sat Oct 01, 2011 1:19 am

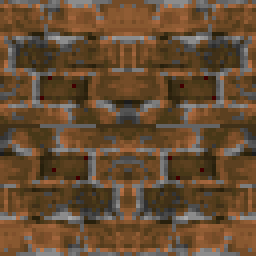
    Another fast example (took me about 10 minutes (!) all together to make from total scratch) of the same method - this time with full brick wall, less grainy texture and less accurate stones with a bit more complex shading.
    Method is the same - small basic random pixel pattern, duclication + flipping all over 64x64, brick outline creating + pasting over - with virtually no post-processing - edited only a few edge pixels.

    I can go like this forever - and the results look impressive IMO.

    (note that all bricks (shade outlines) are horizontally resized (move left part to the left and then stretch the middle of the brick to fit the gap) same brick, duplicated via copy-paste, this is something that is very fast to do).

    Art Tutorials U110

    This can be easily coded in into texture-generator actually Smile

    The same basic stone pattern with a different brick outline will bring a totally different result (the same for the same outline with different texturizing)...so same stone pattern can be re-used for many walls once created.
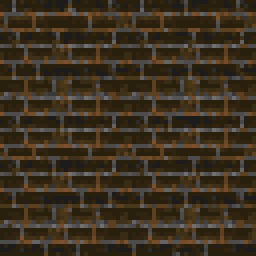
    This one is for "thick" double-line brick outlines - after another 5 minutes:

    Art Tutorials Uu510


    Last edited by doomjedi on Sun Oct 02, 2011 12:27 am; edited 1 time in total
    doomjedi
    doomjedi
    Hardcore Wolfer
    Hardcore Wolfer


    Male
    Number of posts : 1378
    Age : 45
    Location : Israel
    Hobbie : Gaming and Modding, Pixel Art
    Registration date : 2007-03-26

    Art Tutorials Empty Re: Art Tutorials

    Post by doomjedi Sat Oct 01, 2011 3:55 am

    If the basic texturing pattern is more diagonal and has longer dizzed lines - you can easily create a "marble" look for the same wall:

    Art Tutorials Uy110
    doomjedi
    doomjedi
    Hardcore Wolfer
    Hardcore Wolfer


    Male
    Number of posts : 1378
    Age : 45
    Location : Israel
    Hobbie : Gaming and Modding, Pixel Art
    Registration date : 2007-03-26

    Art Tutorials Empty Re: Art Tutorials

    Post by doomjedi Sun Oct 02, 2011 10:10 am

    Making Wolf3D wall texture out of real photo - part I - "general tips"


    1. First stage is to find an image that fits. This means relatively sharp image with large color range, front view of the texture. Not a blurry one.
    Also images that are not TOO large. IMO making x4 downsize is the most you can do to keep the image "readable".
    You can pre-sharpen the images with XNView before you start working on it. Or increase the contrast - with the same tool.
    Try to choose photo that is evenly lit - otherwise it'll be hard to seemless-scroll them horizontally later.

    2. First, to prevent downsizing distortion in proportions - crop the large images into 64x64x2N (N=integer) size (512x512, 1024x1024....) - or at least(!!!) to have the same width and height (64x64xN - N=float).
    It's better to crop from the large image a smaller part and downsize it to 50% than downsizing a much larger image to 25%. Whatever you can crop - crop.
    Remember - usual Wolf3D wall has only 4-8 layers of bricks - you don't need to downsize a wall with 20 bricks in height!

    Art Tutorials Wallx110

    The smallest size of bricks (= largest number of bricks) that can still look OK in Wolf3D (and even those - only over SDL screen resolutions) is 16 - meaning 16 bricks, 4 pixels per brick - so no need to downsize brick walls of more than 16 brick layers:
    (Note - the less brick layers you need in the original picture - the better will look your result on higher downsizing options. 16 bricks on 50% downsize will look less good that 8 bricks on 50% or maybe even on 25%)

    Note you can also crop less bricks (or choose the ones that downsized the best) and duplicate them into more bricks/brick lines (over less "good" downsized bricks) after downsizing (to keep the sharpness) - another reason to crop more (in the original image) and downsize less. "Crop more - downsize less" - it's the moto to keep the image sharp and undistorted. Not to mention you can later use mirroring.
    Sometimes just one good brick can make a wall, with later width variations via crop-move + additional resizing stretch. Just one wooden bar or plate can be a base of the whole wall via duplication (+ some slight pixel work to make it less repeatable)

    Art Tutorials Wallxx10

    3. To keep/increase the sharpness - you can first convert it to Wolf3D palette using SpriteMaker. While this is not a must - it can help.

    4. To prevent distortions - always downsize them to "round" x2 size, meaning 50% or 25% in each step, not 63% or 24%

    5. To keep images sharp - always resize them using nothing but "nearest neighbour" resize/resample filter. I advise to use for resizing (free) XNView or IrfanView software, not MS-Paint! I prefer XNView, it's a bit better and has more resizing filters. (XNview: image-->resize-->resample: nearest neighbour)
    http://www.xnview.com/en/index.html


    Last edited by doomjedi on Wed Oct 26, 2011 5:13 am; edited 3 times in total
    avatar
    ashely97
    Wolf3d n00b
    Wolf3d n00b


    Number of posts : 3
    Age : 41
    Registration date : 2011-10-23

    Art Tutorials Empty Re: Art Tutorials

    Post by ashely97 Sun Oct 23, 2011 10:57 pm

    Hey, thank you for your perseverance of uploading tutorials. Keep on doing it, and I believe more and more people will like your post.
    doomjedi
    doomjedi
    Hardcore Wolfer
    Hardcore Wolfer


    Male
    Number of posts : 1378
    Age : 45
    Location : Israel
    Hobbie : Gaming and Modding, Pixel Art
    Registration date : 2007-03-26

    Art Tutorials Empty Re: Art Tutorials

    Post by doomjedi Tue Oct 25, 2011 12:54 pm

    Thank you very much! Smile

    I just need more ideas of spriting actions that can be useful in modding and which can be described in a form of a tutorial (not all are Smile ).
    You can throw more "HowTo" questions and ideas Smile
    WolferCooker
    WolferCooker
    Hardcore Wolfer
    Hardcore Wolfer


    Male
    Number of posts : 1201
    Age : 34
    Location : Pennsylvania, U.S.A
    Hobbie : Video Games (mostly PC), but been rapidly losing interest in it recently
    Registration date : 2010-09-24

    Art Tutorials Empty Re: Art Tutorials

    Post by WolferCooker Tue Oct 25, 2011 2:25 pm

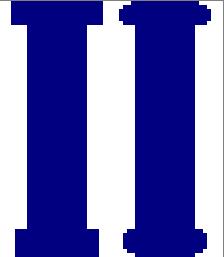
    I got one for you, doomjedi. I see you've already shown us how to make columns, but could you try to make a few more columns with different designs that can be used for the breakable column feature?

    There are only 2 different breakable columns that I know of so far shown below; AReyeP's version which is the most commonly used one in mods that have the breakable column feature, and WLHack's version in his Trail of Schabbs Demo.

    Art Tutorials 1_bmp10 Art Tutorials 2_bmp10


    It could be a great challenge to find secret areas using more than one type of breakable column. It can fool the player into thinking that only one type of column can be destroyed and thus missing out on hidden secret areas, passageways, etc.
    doomjedi
    doomjedi
    Hardcore Wolfer
    Hardcore Wolfer


    Male
    Number of posts : 1378
    Age : 45
    Location : Israel
    Hobbie : Gaming and Modding, Pixel Art
    Registration date : 2007-03-26

    Art Tutorials Empty Re: Art Tutorials

    Post by doomjedi Wed Oct 26, 2011 5:40 am

    Well, this seems to be more of a concrete "art task" request rather then "how-to" tutorial request (and so was not intented for this thread).
    I need to think if this can fit a "tutorial" form...it's hard to tutorialize, as every object (and sure every type of objects) breaks differently...

    I did many breakable objects and bodygibs... but not columns, as it seemed too much of a challenge. IMO it's not that logical for columns to break from bullets, especially stone columns.
    I'd in general recommend to replace columns with a different scenery object that is easier to destroy and to animate debris-wise. A wase, a barrel....does the same trick - but much easier to animate.
    WolferCooker
    WolferCooker
    Hardcore Wolfer
    Hardcore Wolfer


    Male
    Number of posts : 1201
    Age : 34
    Location : Pennsylvania, U.S.A
    Hobbie : Video Games (mostly PC), but been rapidly losing interest in it recently
    Registration date : 2010-09-24

    Art Tutorials Empty Re: Art Tutorials

    Post by WolferCooker Wed Oct 26, 2011 9:47 am

    Never mind then.
    Ipank7000
    Ipank7000
    Can I Play, Daddy?
    Can I Play, Daddy?


    Male
    Number of posts : 42
    Age : 27
    Location : Depok, Indonesia
    Job : Studying in Indonesia University (Universitas Indonesia)
    Registration date : 2011-04-21

    Art Tutorials Empty Re: Art Tutorials

    Post by Ipank7000 Sun Feb 05, 2012 2:03 am

    doomjedi wrote:Tutorial - making textured stone/brick wall

    1. Choose "average"/"main" color of your planned wall:

    .......

    5. Paste the brick pattern over base texture selecting average color as transparent

    What's the tool to do that. I mean, did you use spritemaker? in spritemaker there aren't "paste" (or copy) operation. I'm so confusing.
    doomjedi
    doomjedi
    Hardcore Wolfer
    Hardcore Wolfer


    Male
    Number of posts : 1378
    Age : 45
    Location : Israel
    Hobbie : Gaming and Modding, Pixel Art
    Registration date : 2007-03-26

    Art Tutorials Empty Re: Art Tutorials

    Post by doomjedi Sun Feb 05, 2012 3:02 am

    Ipank7000 wrote:
    doomjedi wrote:Tutorial - making textured stone/brick wall

    1. Choose "average"/"main" color of your planned wall:

    .......

    5. Paste the brick pattern over base texture selecting average color as transparent

    What's the tool to do that. I mean, did you use spritemaker? in spritemaker there aren't "paste" (or copy) operation. I'm so confusing.
    MS-Paint. I do all manual pixelwork there.
    Windows XP version preferrably (not the Windows 7 one).
    If you want - can send you the "old" XP Ms-Paint.

    Art Tutorials Paint10

    (Transparent color is "background color" set with rightclick on the color)
    Ipank7000
    Ipank7000
    Can I Play, Daddy?
    Can I Play, Daddy?


    Male
    Number of posts : 42
    Age : 27
    Location : Depok, Indonesia
    Job : Studying in Indonesia University (Universitas Indonesia)
    Registration date : 2011-04-21

    Art Tutorials Empty Re: Art Tutorials

    Post by Ipank7000 Sat Feb 11, 2012 6:44 pm

    Thanks doomjedi now i can make some wall textures easier Smile. Sorry for late responses. BTW check your PM inbox in DHW forum.
    doomjedi
    doomjedi
    Hardcore Wolfer
    Hardcore Wolfer


    Male
    Number of posts : 1378
    Age : 45
    Location : Israel
    Hobbie : Gaming and Modding, Pixel Art
    Registration date : 2007-03-26

    Art Tutorials Empty Re: Art Tutorials

    Post by doomjedi Sat Feb 11, 2012 11:06 pm

    You're welcome Smile
    doomjedi
    doomjedi
    Hardcore Wolfer
    Hardcore Wolfer


    Male
    Number of posts : 1378
    Age : 45
    Location : Israel
    Hobbie : Gaming and Modding, Pixel Art
    Registration date : 2007-03-26

    Art Tutorials Empty Re: Art Tutorials

    Post by doomjedi Sun Apr 15, 2012 7:18 am

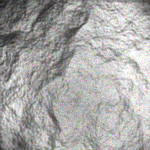
    I'm in a process of learning for to use PhotoShop effectively for hi-res texture making....wanted to share with you a few cool tutorials (I'll probably edit this post to add more links from time to time):

    1. Making rock texture:
    https://youtu.be/nODaUXV6CVE
    (note: for wood - select "render-->fibers" instead of "render-->clouds")

    My first attempt:

    Art Tutorials Buildp10


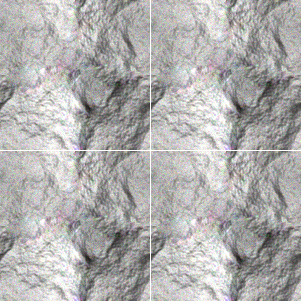
    2. Making tilable texture:
    https://youtu.be/oy2cwSV0Iys

    My first attempt with result of tutorial 1:

    Art Tutorials Buildp11

    It's amazing that in PhotoShop you can do in a minute something you've need at least half an hour to do manually in MS-Paint (and at those resulitions - at least an hour)
    WolferCooker
    WolferCooker
    Hardcore Wolfer
    Hardcore Wolfer


    Male
    Number of posts : 1201
    Age : 34
    Location : Pennsylvania, U.S.A
    Hobbie : Video Games (mostly PC), but been rapidly losing interest in it recently
    Registration date : 2010-09-24

    Art Tutorials Empty Re: Art Tutorials

    Post by WolferCooker Wed Apr 18, 2012 9:27 am

    Now THAT is what I call high resolution by Wolf3d standards! Awesome work Doom!
    doomjedi
    doomjedi
    Hardcore Wolfer
    Hardcore Wolfer


    Male
    Number of posts : 1378
    Age : 45
    Location : Israel
    Hobbie : Gaming and Modding, Pixel Art
    Registration date : 2007-03-26

    Art Tutorials Empty Re: Art Tutorials

    Post by doomjedi Wed Apr 18, 2012 9:39 am

    Thanks Smile

    That was just very fast and basic attempt to follow the tutorials to see if they work. I can make it better next time Smile
    If you noticed - it's made from scratch, no base rock image is involved, it's fully "generated within photoshop" image - with no pixel work at all and in a matter of just a minute or two.

    You can't imagine (well, you can if you watched the tutorials) how easy is it to make ANY resolution rock or wood texture, with unique look each time - the resolution doesn't matter - making 64x64 one is as easy as to make 2048x2048 one, as there is no direct pixelwork involved and no base image needed to import/use.
    doomjedi
    doomjedi
    Hardcore Wolfer
    Hardcore Wolfer


    Male
    Number of posts : 1378
    Age : 45
    Location : Israel
    Hobbie : Gaming and Modding, Pixel Art
    Registration date : 2007-03-26

    Art Tutorials Empty Re: Art Tutorials

    Post by doomjedi Thu Oct 30, 2014 2:00 pm

    Best free texture generator/maker/creator.

    Images are configurable, automatically tilable and export in any resolution, good examples, customizable presets......

    http://neotextureedit.sourceforge.net/

    Note the "bitmap" option, it open endless possiblities for any texture as you can add any external Bitmap into the texture, beyond procedural texture creation. Example for wall I've made with it:

    Spoiler:

    Spoiler:

    Sponsored content


    Art Tutorials Empty Re: Art Tutorials

    Post by Sponsored content


      Current date/time is Tue Oct 08, 2024 2:07 pm